Step 1: The ExternalInterface Class
Where Can I Use it?
Currently the ExternalInterface Class is available in the following browsers:
- Internet Exlplorer 5.0+
- Netscape 8.0+
- Mozilla 1.7.5+
- Firefox 1.0+
- Safari 1.3+
What Can I do With it?
The ExternalInterface Class allows you to:
- Call any Javascript function from ActionScript.
- Call any ActionScript function from Javascript.
- Pass arguments and paramters between the two.
- Receive a return value from a Javascript function.
- Return a value to a Javascript function.
Step 2: Let's Create Our HTML Page
We'll jump right into this and start with a really basic example. First we need to create our HTML Page, so fire up your favorite HTML Editor and let's start. Create a form inside your HTML.
- >
- <html xmlns="http://www.w3.org/1999/xhtml">
- <head>
- <meta http-equiv="Content-Type" content="text/html; charset=UTF-8" />
- <title>ExternalInterface Test 1title>
- head>
-
- <body>
- <div id="testArea">
- <form name="myForm">
- <label for="output">Text from Flashlabel>
- <input type="text" id="output" name="output" value="" />
- form>
- div>
- body>
- html>
Step 3: SWF Referencing Function
To easily reference the SWF in our HTML, we're going to create a Javascript function so that we can reference the SWF in our code. To accomplish this, place this script between the "head" tags.
This function will return the SWF that is passed as a parameter of the flashMovie() function. For example, "flashMovie('testMovie');" would return the swf with an id of 'testMovie'.
Step 4: Create Function to Receive Values From ActionScript
Now we'll create a Javascript function which accepts a value from ActionScript. Place this inside our already made script tags.
- function sendToJS(value)
- {
- document.forms["myForm"].output.value = value;
- }
This will take whichever value we get from the ActionScript and place it in our textfield with an id of "output".
Step 5: Open up Flash
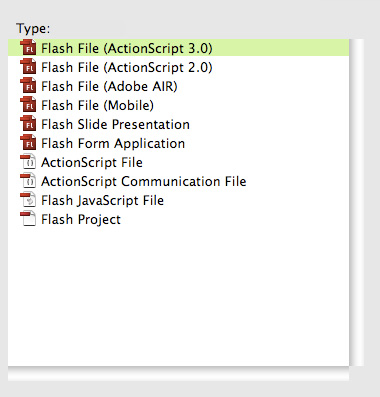
Let's open up Flash and start working on the ActionScript. Create a new ActionScript 3.0 File and create a new Document Class named "EIFace1".

Step 6: Setup the Document Class
I'll be using FDT to write EIFace.as, but you're welcome to use any ActionScript Editor you feel comfortable with. We'll start out by creating a standard Document Class Shell.
- package
- {
- import flash.display.Sprite;
- /**
- * @author kreativeKING
- */
- public class EIFace1 extends Sprite
- {
- public function EIFace1()
- {
-
- }
- }
- }
Step 7: Creating Our TextField
Create the textfield we'll be using to send our values.
- field1 = new TextField();
- field1.type = TextFieldType.INPUT;
- field1.width = 300;
- field1.height = 20;
- field1.border = true;
- field1.borderColor = 0x565656;
- field1.background = true;
- field1.backgroundColor = 0x121212;
- field1.defaultTextFormat = new TextFormat("Arial", 14, 0xEFEFEF);
- field1.x = stage.stageWidth * .5 - field1.width *.5;
- field1.y = stage.stageHeight * .5- field1.height *.5;
- stage.addChild(field1);
Step 8: Create a Send Button
Create a Button to click. I'm not a fan of using components, so I'll be building a button from scratch using Flash IDE. You're welcome to just create a box or use the SimpleButton component; I'll let you use those creative juices. If you need no further help with building a button, you can skip to Step 11.
Start by creating a rectangle with the Rectangle Primitive Tool. I won't provide specific values, just feel it out to asetting you like.

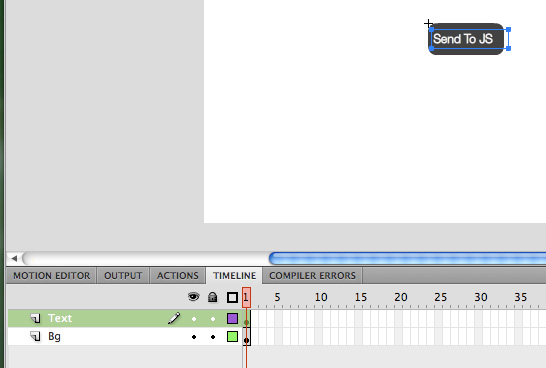
Step 9: Continue the Button Creation
Convert the rectangle into a MovieClip.

Create a New Layer inside the MovieClip and place "Send To JS" text.
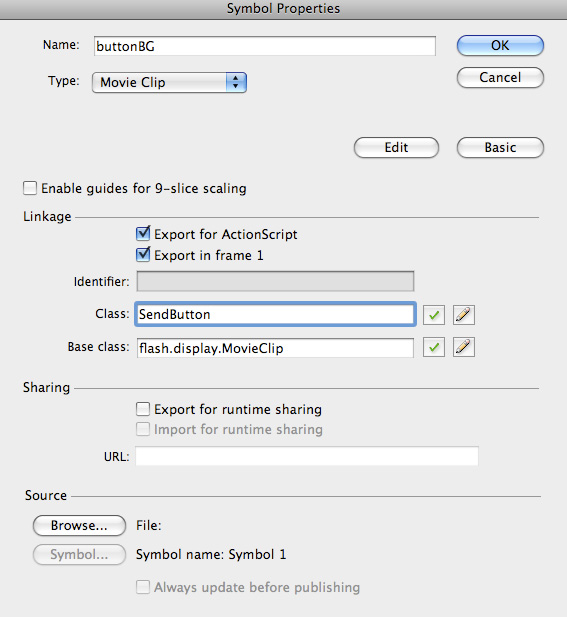
Step 10: Export For ActionScript
Go into your library, right-click on the button and Export for ActionScript.
Step 11: Code in the Button
We're going to code our button into our Document Class.
- button1 = new SendButton();
- button1.x = stage.stageWidth * .5 - button1.width *.5;
- button1.y = field1.y + 30;
-
- stage.addChild(button1);
Step 12: Where Are We Now
This is how your HTML page should now appear.
- "-//W3C//DTD XHTML 1.0 Strict//EN" "http://www.w3.org/TR/xhtml1/DTD/xhtml1-strict.dtd">
- "http://www.w3.org/1999/xhtml">
-
- "Content-Type" content="text/html; charset=UTF-8" />
-
ExternalInterface Test 1 -
-
-
-
- "testArea">
- >
- "text" id="output" name="output" value="" />
-
-
The Document Class should look like this.
- package
- {
- import flash.display.MovieClip;
- import flash.display.Sprite;
- import flash.text.TextField;
- import flash.text.TextFieldType;
- import flash.text.TextFormat;
- /**
- * @author kreativeKING
- */
- public class EIFace1 extends Sprite
- {
- private var field1 : TextField;
- private var button1 : MovieClip;
-
- public function EIFace1()
- {
- field1 = new TextField();
- field1.type = TextFieldType.INPUT;
- field1.width = 300;
- field1.height = 20;
- field1.border = true;
- field1.borderColor = 0x565656;
- field1.background = true;
- field1.backgroundColor = 0x121212;
- field1.defaultTextFormat = new TextFormat("Arial", 14, 0xEFEFEF);
- field1.x = stage.stageWidth * .5 - field1.width *.5;
- field1.y = stage.stageHeight * .5- field1.height *.5;
-
- stage.addChild(field1);
-
- button1 = new SendButton();
- button1.x = stage.stageWidth * .5 - button1.width *.5;
- button1.y = field1.y + 30;
-
- stage.addChild(button1);
- }
- }
- }
Step 13: Create ActionScript to Javascript Function
We now need to create the function that sends the data from Flash to Javascript. This will be a simple function which sends a string.
- button1.addEventListener(MouseEvent.CLICK, sendToJS);
- private function sendToJS(e : MouseEvent) : void
- {
- if(ExternalInterface.available)
- {
- ExternalInterface.call("fromAS", field1.text);
- }
- }
We first add an event listener to our button, inside our Document Classes constructor. Then we create our listener. The ExternalInterface.available property checks to see if our browser is able to use the ExternalInterface Class. This isn't necessary to use as we know our browser can support it, but it's good practice for developing for the web and we're never sure if the client browser is going to becompatible.
The ExternalInterface.call() function is what we use to call our Javascript function. The first parameter is the name of the Javascript function we want to call. It's the name of our function in Javascript as a string. The second parameter is the value we want to pass to the Javascript function. In this case, we're passing the value of our textfield.
Note: You can pass as many parameters as you want, but the first parameter needs to be the name of the Javascript function.
Step 14: Testing Time
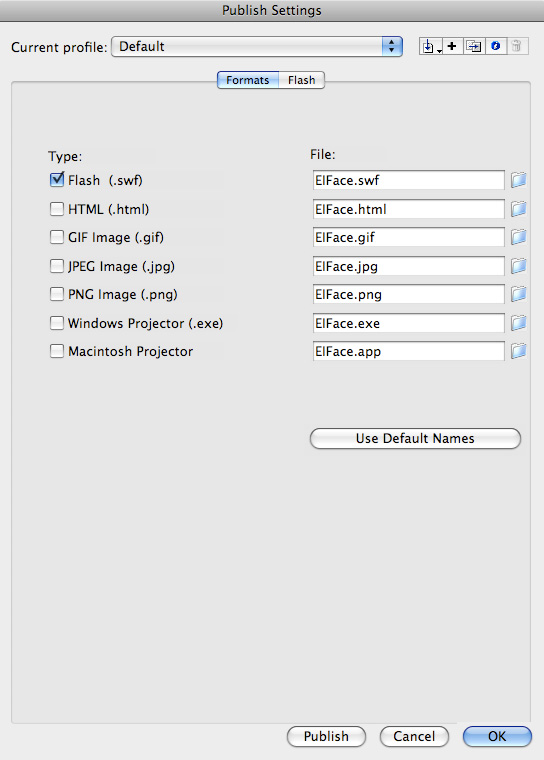
Before we can test, we first have to embed our SWF into the HTML. I must stress that it's best to use SWFObject and not the default method that Flash uses to embed SWF files. Let's publish our SWF, setup SWFObject and embed our file.
Here's the SWFObject Embed code which goes into the head of the HTML file:
It's also important that you give the SWF an id. This is important with using the ExternalInterface and for us to target it using the Javascript function we created earlier. Let's create our div that will house the SWF file.
- <div id="flashDiv">
- <p>This will get replaced with a SWF. If not you need to update your Flash Player.p>
- div>
Here are the Document Class and HTML file up to this point:
- package
- {
- import flash.external.ExternalInterface;
- import flash.events.MouseEvent;
- import flash.display.MovieClip;
- import flash.display.Sprite;
- import flash.text.TextField;
- import flash.text.TextFieldType;
- import flash.text.TextFormat;
- /**
- * @author kreativeKING
- */
- public class EIFace1 extends Sprite
- {
- private var field1 : TextField;
- private var button1 : MovieClip;
-
- public function EIFace1()
- {
- field1 = new TextField();
- field1.type = TextFieldType.INPUT;
- field1.width = 300;
- field1.height = 20;
- field1.border = true;
- field1.borderColor = 0x565656;
- field1.background = true;
- field1.backgroundColor = 0x121212;
- field1.defaultTextFormat = new TextFormat("Arial", 14, 0xEFEFEF);
- field1.x = stage.stageWidth * .5 - field1.width *.5;
- field1.y = stage.stageHeight * .5- field1.height *.5;
-
- stage.addChild(field1);
-
- button1 = new SendButton();
- button1.x = stage.stageWidth * .5 - button1.width *.5;
- button1.y = field1.y + 30;
-
- stage.addChild(button1);
-
- button1.addEventListener(MouseEvent.CLICK, sendToJS);
- }
-
- private function sendToJS(e : MouseEvent) : void
- {
- if(ExternalInterface.available)
- {
- ExternalInterface.call("fromAS", field1.text);
- }
- }
- }
- }
- >
- <html xmlns="http://www.w3.org/1999/xhtml">
- <head>
- <meta http-equiv="Content-Type" content="text/html; charset=UTF-8" />
- <title>ExternalInterface Test 1title>
- <script type="text/javascript" src="http://ajax.googleapis.com/ajax/libs/swfobject/2.1/swfobject.js">script>
- <script type="text/javascript">
- var flashvars = {};
- var params = {};
- params.allowscriptaccess = "always";
- params.allownetworking = "all";
- var attributes = {};
- attributes.id = "EIFace";
- swfobject.embedSWF("EIFace.swf", "flashDiv", "350", "200", "9.0.0", false, flashvars, params, attributes);
- script>
- <script type="text/javascript">
- function flashMovie(movieName)
- {
- if(window.document[movieName])
- {
- return window.document[movieName];
- }
- else
- {
- return document.getElementById(movieName);
- }
-
- }
-
- function fromAS(value)
- {
- document.forms["myForm"].output.value = value;
- }
- script>
- head>
-
- <body>
- <div id="flashDiv">
- <p>This will get replaced with a SWF. If not you need to update your Flash Player.p>
- div>
- <div id="testArea">
- <form name="myForm">
- <label for="output">Text from Flashlabel>
- <input type="text" id="output" name="output" value="" />
- form>
- div>
- body>
- html>
Now open up your HTML wrapper and test it out. You'll see that the value of the textfield in flash becomes the value on the textfield in our HTML. At a glance, the code behind this is pretty simple and straight forward. Now let's try sending some information from Javascript to ActionScript.
Step 15: Make Additional Fields
We're going to create additional fields to send information from Javascript to ActionScript.
- <label for="input">Send Text To Flashlabel>
- <input type="text" id="input" name="input" value="" />
- <input type="button" value="SendToFlash" onClick="sendToFlash(myForm.input.value);" />
- field2 = new TextField();
- field2.type = TextFieldType.DYNAMIC;
- field2.width = 300;
- field2.height = 20;
- field2.border = true;
- field2.borderColor = 0x565656;
- field2.background = true;
- field2.backgroundColor = 0xEFEFEF;
- field2.defaultTextFormat = new TextFormat("Arial", 14, 0x121212);
- field2.x = stage.stageWidth * .5 - field2.width *.5;
- field2.y = field1.y - 50;
-
- stage.addChild(field2);
Step 16: Create The Javascript to ActionScript Function
We need to create a function which sends the value from inside our HTML to Flash. This is similar to the function we created to send values from ActionScript to Javascript.
- function sendToFlash(value)
- {
- flashMovie("EIFace").sendToFlash(value);
- }
We use the function we created earlier to reference the embedded SWF. Now we must go into our Document Class and set up Flash to receive values from Javascript and create a new function that Javascript will be calling.
Step 17: Adding Callbacks
To register Javascript functions, we need to add callbacks so that Flash knows what we're trying to send when we call an ActionScript function. Let's finally start calling some ActionScript.
- private function addCallbacks() : void
- {
- if(ExternalInterface.available)
- {
- ExternalInterface.addCallback("sendToFlash", fromJS);
- }
- }
The ExternalInterface.addCallback() function registers a function in ActionScript to be called by Javascript. The first parameter is the function name by which Javascript will know the function. The second parameter is the actual function.
Simply put, that means in our Javascript, we would call sendToFlash() and that would invoke the fromJS() function in ActionScript.
Step 18: Creating fromJS()
Now we're going to create the fromJS() function. This is a very simple function that will assign the value passed to it to the text field.
- private function fromJS(value:String) : void
- {
- field2.text = value;
- }
Time for another test and see what we come up with. Here's what the Document Class and HTML look like now:
- package
- {
- import flash.external.ExternalInterface;
- import flash.events.MouseEvent;
- import flash.display.MovieClip;
- import flash.display.Sprite;
- import flash.text.TextField;
- import flash.text.TextFieldType;
- import flash.text.TextFormat;
- /**
- * @author kreativeKING
- */
- public class EIFace1 extends Sprite
- {
- private var field1 : TextField;
- private var button1 : MovieClip;
- private var field2 : TextField;
-
- public function EIFace1()
- {
- field1 = new TextField();
- field1.type = TextFieldType.INPUT;
- field1.width = 300;
- field1.height = 20;
- field1.border = true;
- field1.borderColor = 0x565656;
- field1.background = true;
- field1.backgroundColor = 0x121212;
- field1.defaultTextFormat = new TextFormat("Arial", 14, 0xEFEFEF);
- field1.x = stage.stageWidth * .5 - field1.width *.5;
- field1.y = stage.stageHeight * .5- field1.height *.5;
-
- stage.addChild(field1);
-
- field2 = new TextField();
- field2.type = TextFieldType.DYNAMIC;
- field2.width = 300;
- field2.height = 20;
- field2.border = true;
- field2.borderColor = 0x565656;
- field2.background = true;
- field2.backgroundColor = 0xEFEFEF;
- field2.defaultTextFormat = new TextFormat("Arial", 14, 0x121212);
- field2.x = stage.stageWidth * .5 - field2.width *.5;
- field2.y = field1.y - 50;
-
- stage.addChild(field2);
-
- button1 = new SendButton();
- button1.x = stage.stageWidth * .5 - button1.width *.5;
- button1.y = field1.y + 30;
-
- stage.addChild(button1);
-
- button1.addEventListener(MouseEvent.CLICK, sendToJS);
- addCallbacks();
- }
-
- private function addCallbacks() : void
- {
- if(ExternalInterface.available)
- {
- ExternalInterface.addCallback("sendToFlash", fromJS);
- }
- }
-
- private function fromJS(value:String) : void
- {
- field2.text = value;
- }
-
- private function sendToJS(e : MouseEvent) : void
- {
- if(ExternalInterface.available)
- {
- ExternalInterface.call("fromAS", field1.text);
- }
- }
- }
- }
- "-//W3C//DTD XHTML 1.0 Strict//EN" "http://www.w3.org/TR/xhtml1/DTD/xhtml1-strict.dtd">
- "http://www.w3.org/1999/xhtml">
-
- "Content-Type" content="text/html; charset=UTF-8" />
-
ExternalInterface Test 1 -
-
-
-
-
-
- "flashDiv">
-
This will get replaced with a SWF. If not you need to update your Flash Player.
-
Step 19: Results
As you can see, placing text in our newest field and hitting send sends the value into the Flash text field. Using the ExternalInterface class is very simple and can often come in handy when creating API's and applications that can be manipulated outside of the Flash Movie. For example, this can be implemented in Video Player API's for creating and controlling the video with Javascript.
Step 20: Who Uses Classic Javascript Anymore?
For most of the people out there now, no one is really using classic Javascript; jQuery is the wave of the future. Here's an example of using jQuery instead of classic Javascript.
Here's the new and updated HTML for use with jQuery:
- "-//W3C//DTD XHTML 1.0 Strict//EN" "http://www.w3.org/TR/xhtml1/DTD/xhtml1-strict.dtd">
- "http://www.w3.org/1999/xhtml">
-
- "Content-Type" content="text/html; charset=UTF-8" />
-
ExternalInterface Test 1 -
-
-
-
-
-
-
- "flashDiv">
-
This will get replaced with a SWF. If not you need to update your Flash Player.
-
Conclusion
Hopefully you now have a better grasp on using the ExternalInterface Class. If you have any questions or ideas of what else you would like to learn, just leave a comment or tweet me and I'll see what I can do. I hope you learned the concepts and start using them in your own projects. Thanks for reading!
kreativeKING
source from : flash tuts+

0 nhận xét:
Post a Comment