Tutorial Details
- Program: Adobe Illustrator CS4
- Difficulty: Easy
- Estimated Completion Time: 30 minutes
Step 1
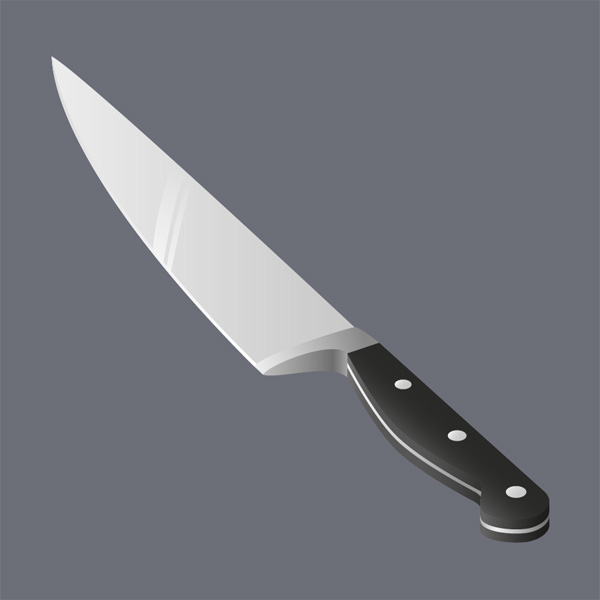
We want to create a chef's knife in perspective view to incorporate in an illustrated recipe. First read up what Wikipedia has to say about this type of knife. Now fire up Illustrator, hit Command + N to create a new document and choose A4 with landscape orientation. Imagine a big chef's knife lying on the cutting board at an angle, then draw the following shape using the Pen Tool (P).
Step 2
That will be the blade. Make sure it's a closed shape. Get rid of the black stroke and fill it with a soft medium-to-light gray gradient, making sure it's aligned with the blade so the tip will be lighter. From now on let's assume that the light comes from the left so the right side will be darker.

Step 3
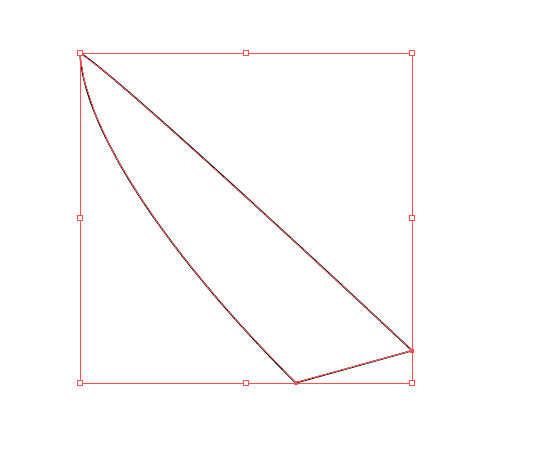
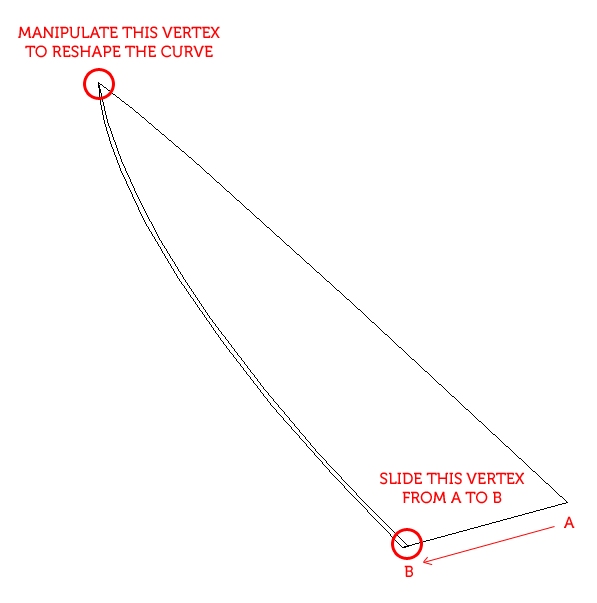
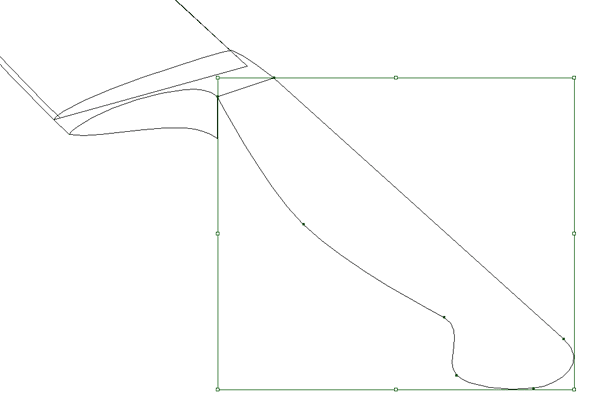
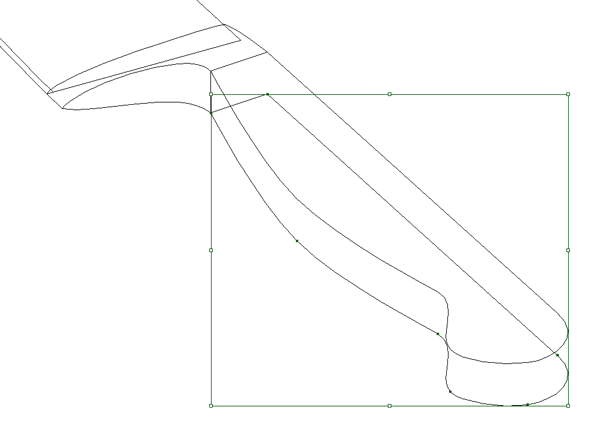
Let's draw the cutting edge. With the blade selected copy it (Command + C) and paste it in front (Command + F). With the Direct Selection Tool (A) slide the bottom right vertex close to the edge, then reshape the edge's curve by manipulating the handles of the top left vertex. You should get a thin shape as shown.
Step 4
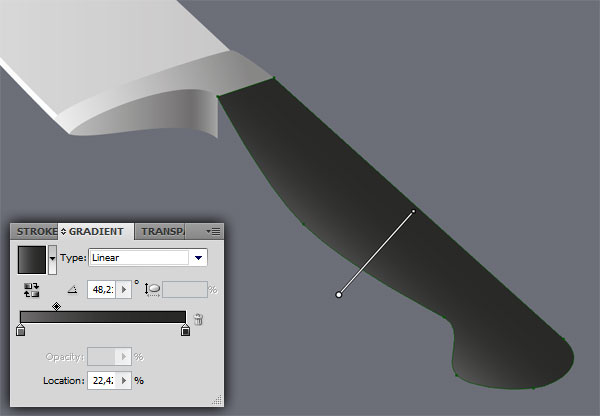
Shade the cutting edge with a Linear Gradient from medium gray (top) to white (bottom) - nice and shiny!

Step 5
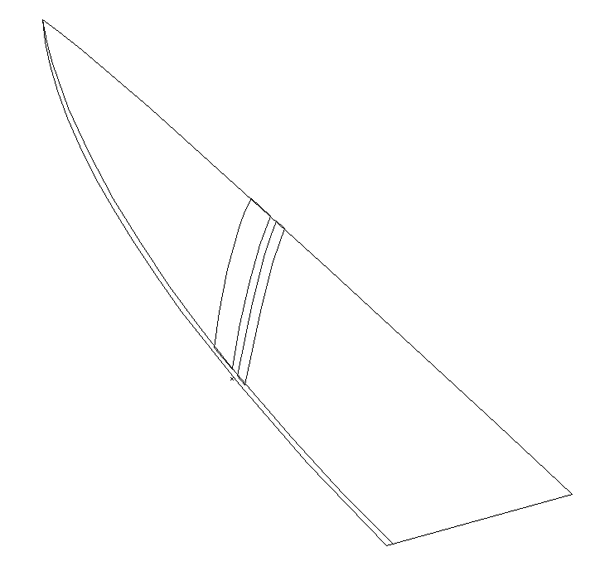
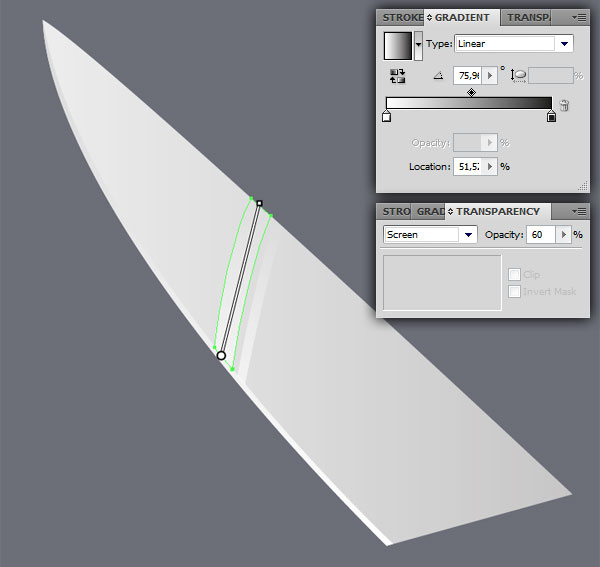
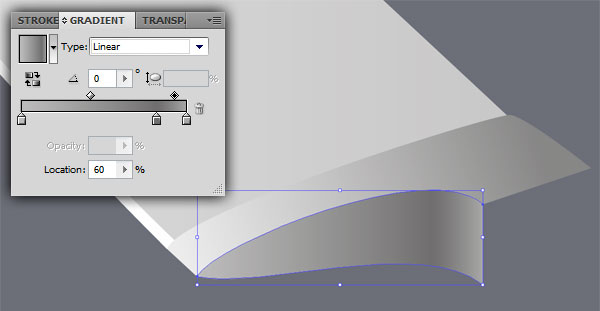
Draw two arched rectangles across the blade to simulate reflections. Always use Smart Guides (Command + U) to make sure the anchor points snap to the paths. Make the bottom vertices to overlap the cutting edge a little.
Step 6
Shade the reflections with standard, white to black gradients aligned with their direction. The manipulator in the next image, available only in Illustrator CS4, shows you the gradient's direction.
If you have an older version of Illustrator just grab the Gradient Tool (G) from the toolbar, then click and drag on the object to orient the fill. We want to make the reflections fade as they recede from view so put the black color on top. Now in the Transparency panel, select the Screen blending mode from the pull-down menu and reduce the Opacity to 60%.
Step 7
Draw the bolster now. Make the right part stand out from the blade's profile, but snap the left anchor points to the cutting edge, so the bolster will look thicker at the top and tapered down at the bottom.
Step 8
Shade the bolster with a linear gradient. Always maintain consistency with the light's direction by applying the lighter shade to the left side.
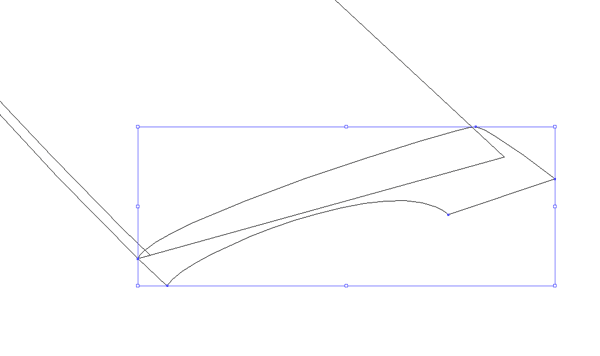
Step 9
Add thickness to the bolster by drawing the following shape. Again use Smart Guides for precision.
Step 10
Fill this shape using a gradient with three shades to emphasize the curve.
Step 11
Draw the top of the handle with a single closed path.
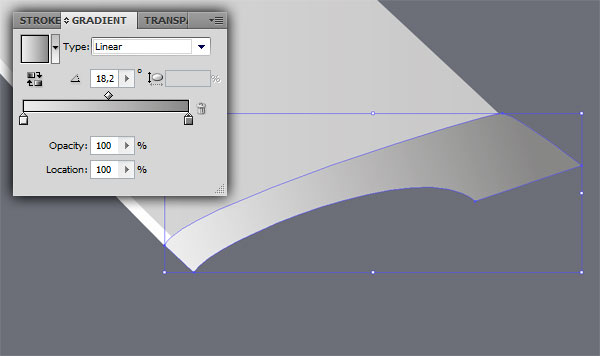
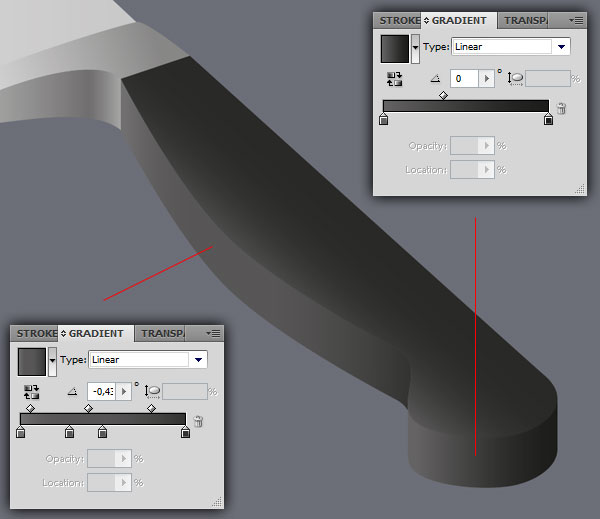
Step 12
Fill it with a very dark gradient and make sure the left edge is slightly brighter. For the orientation refer to the following image.
Step 13
Create a copy of this object, right-click on it and select Arrange > Send to Back, or use the keyboard shortcut Shift + Command + Left Bracket key. Then move it down and snap it to the bottom of the bolster's thickness.
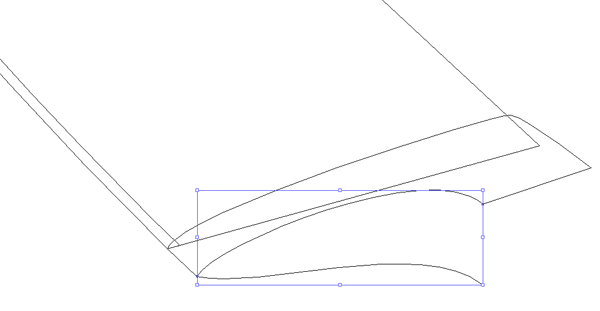
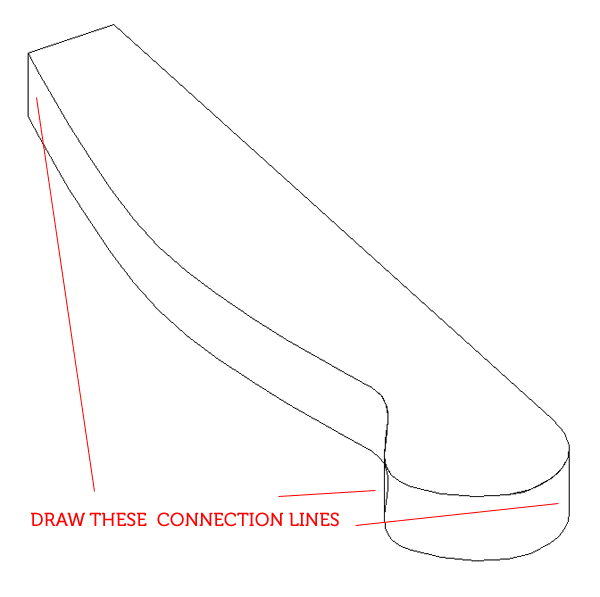
Step 14
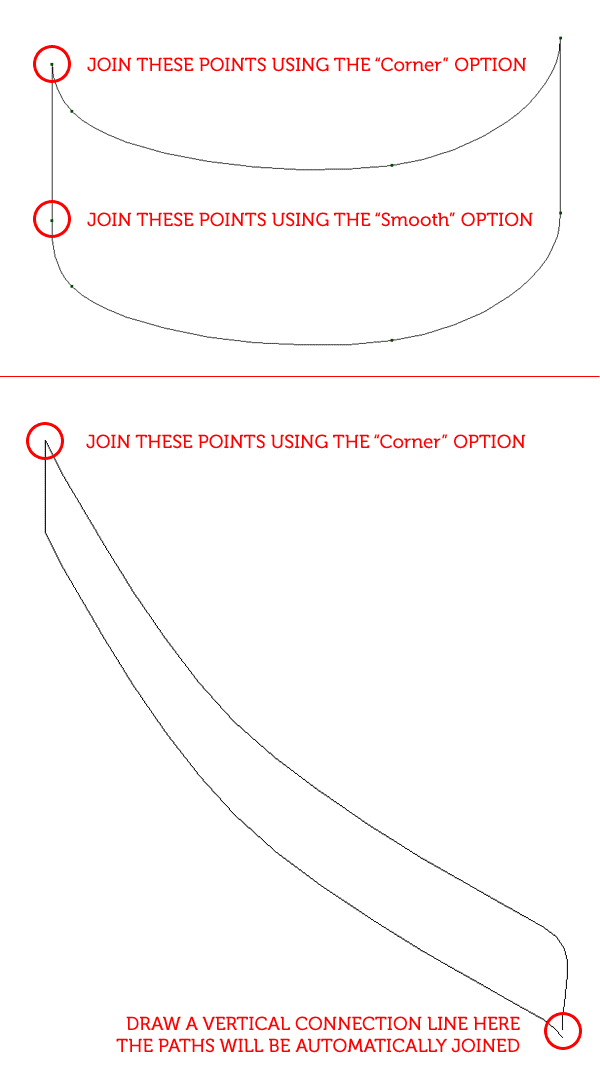
Erase the topmost anchor point then draw vertical connection lines:
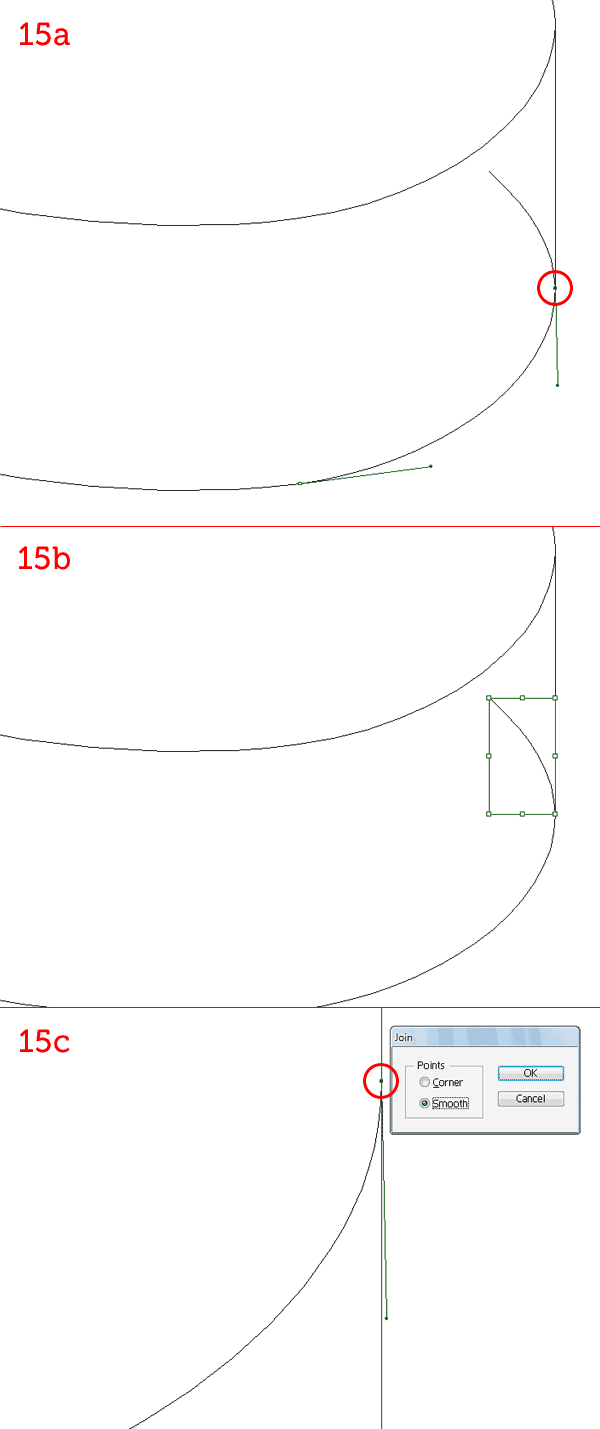
Step 15
Now grab the Scissors Tool (C) and click on the bottom curve where the vertical connection line touches it (15a). Erase the little path that sticks out (15b). Now with the Direct Selection tool (A), draw a window around the new anchor point. Hit J to Join the two paths, choosing the Smooth option (15c).
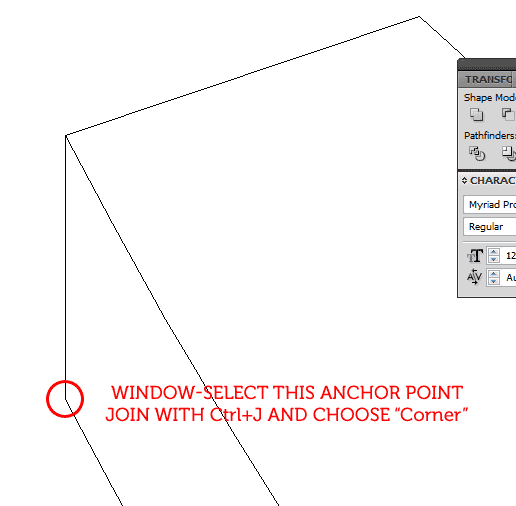
Step 16
Join the leftmost segments as in the following image.
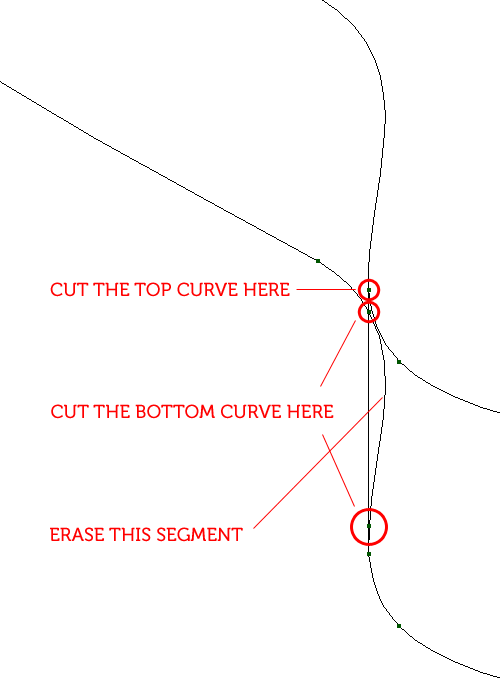
Step 17
Duplicate the top curve and hide it. We'll combine its copy with the bottom curve to create the side of the handle. Lock the middle connection line, then use the Scissors Tool (C) to cut both the top and bottom curves where they intersect with it. When you're done, erase the S-shaped segment between the two curves. Refer to the image below.
Step 18
Join the new paths to create two shapes for the side of the handle. Follow the instructions in the next image.
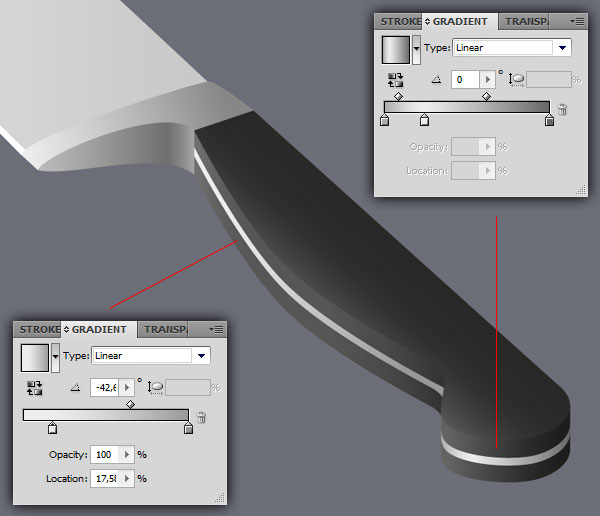
Step 19
Let's shade the side of the handle. Again use gradients that help define the shape, remaining consistent with the light's direction.
Step 20
Create the tang of the blade, the thin metal strip enclosed in the handle, by copying (Command + C) and pasting in front (Command + F) the two side shapes.
Lock the original shapes to avoid selecting them. Using the Direct Selection Tool (A), move the top anchor points down and the bottom points up, effectively creating a thin, centered slice of the side shapes. Shade the tang with light gray gradients, simulating both the rounded shape and the reflections.
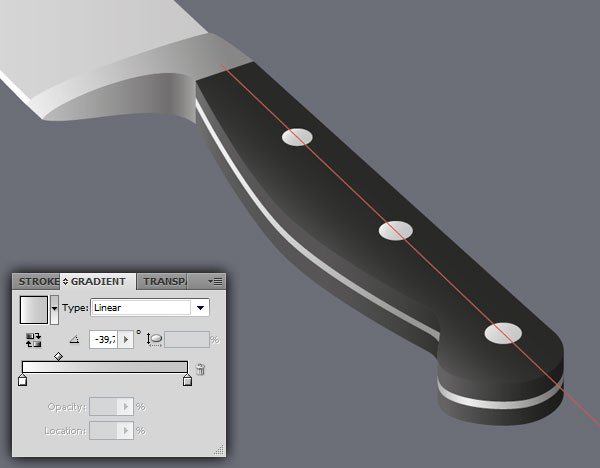
Step 21
Create the handle's rivets with three simple ellipses. Align and position them correctly by using a perspective guide. Make them bigger as they get closer. Shade them with linear gradients from white to light gray to simulate subtle ambient reflections. Our chef's knife is now finished!
Conclusion
Even if you don't possess advanced Illustrator skills you can still create realistic objects by paying attention to volume, perspective and shading. I hope this tutorial inspired you and made you hungry for more!
Copyright by : vector.tutsplus.com

0 nhận xét:
Post a Comment