by Didik Wijaya
 Hi, now it's time to try something different: Photoshop tutorial. In this tutorial I will show you how to create cool photo effect. I will create a face from a lot of text. This effect will looks good on poster, book cover and so on. It has a very strong sense of dramatic feeling.
1. You need a black and white photo. I use Albert Einstein's photo. You can use any photo actually. But, it is recommended that your photo has a strong constrast between light dan dark areas.
If you don't have black and white photo, you can turn color photo into black and white. From top menu choose Image>Adjustment>Desaturate. You can also adjust the contrast between dark and light area using Image>Adjustment>Levels.
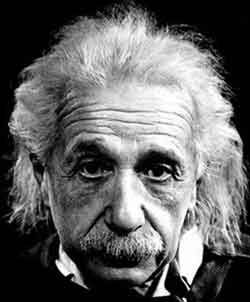
If you want to get this Einstein photo, click here. This link contains bigger version of this image.
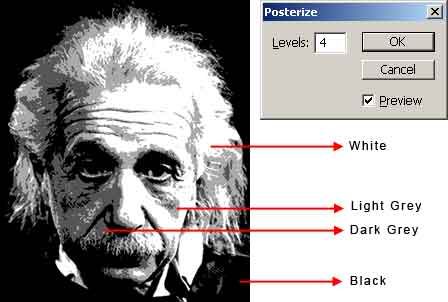
2.From top menu, choose Image>Adjustment>Posterize. Use Levels=4. Posterize will make the photo has 4 colors only, ranging from white to black.
3. Next, from top menu choose Select>Color Range. Click on image to select white area. Click OK.
4. You need to save this selection. From top menu Select>Save Selection. Type "White" in Name input box..Click OK. When finished Ctrl+D to deselect.
5. Repeat the above process (selecting and saving the selection) to all colors. Finally you'll get 4 selection saved in channels. Open Channels tab to see the saved selections.
In Part 1 tutorial, you have prepared a photo with 4 channels. The next step is to add a text layer and modify it. Be patient, soon you'll get a nice text face effect.
1. Create a text layer like image below and position it above photo layer. This layer is a white text with black background. This layer should be a bitmap.
If you want to create this image yourself, first create new layer and fill with black color. Copy paste any text. now, you have 2 new layers (black color and text). The text should be small enough and continues as a single paragraph. I copy paste from an article about Albert Einstein from wikipedia. Then selelct and merge both layers (Layers>Merge Layers).
You can also download the bitmap text image here. Just open, convert into RGB (Image>Mode>RGB) and drag this image above current poterized photo.
2.Make sure layer "text" is selected. From top menu choose Select>Load Selection. In dialog box, choose White Channel. Click OK.
3. Next, from top menu, choose Filter>Other>Maximum. Use Radius=2. Maximize will make selected text brighter and bigger. When finished, deselect the selection (Ctr+D)
4. Repeat above process.
Load Light Grey channel into selection. Apply Feather to make selection more smooth (Select>Feather). Use Feather Radius=5. Apply Filter>Other>Maximum with Radius=1.
Load Black channel as selection. Apply Feather to make selection more smooth (Select>Feather). Use Feather Radius=5. Apply Filter>Other>Minimum with Radius=1.
Leave Dark Grey channel as it is. Or load Dark Grey channel as selection and add Filter>Blur>Gaussian Blur to smooth text edges.
Image below shows finished Text Face Effect

source from : escalight

0 nhận xét:
Post a Comment