Final Image Preview
Take a look at the image we'll be creating. Want access to the full PSD files and downloadable copies of every tutorial, including this one? Join Psd Plus for just $9/month. You can view the final image preview below or view a larger version here.

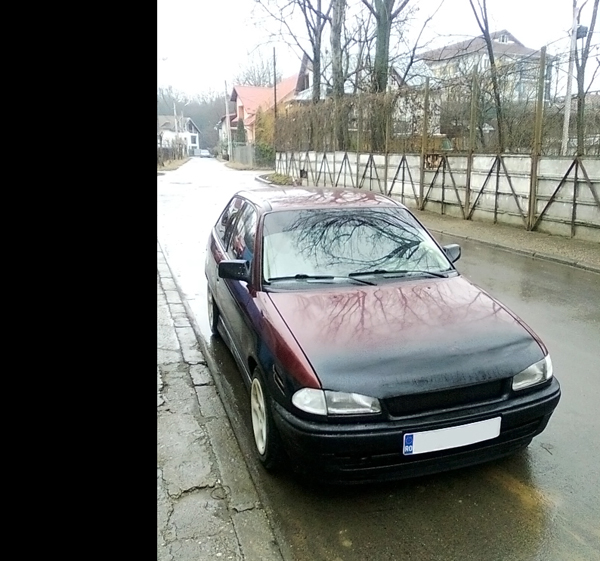
Step 1
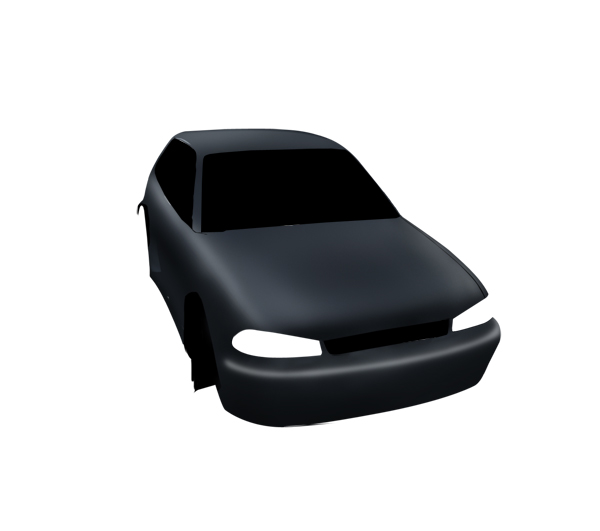
First open the reference image in Photoshop.
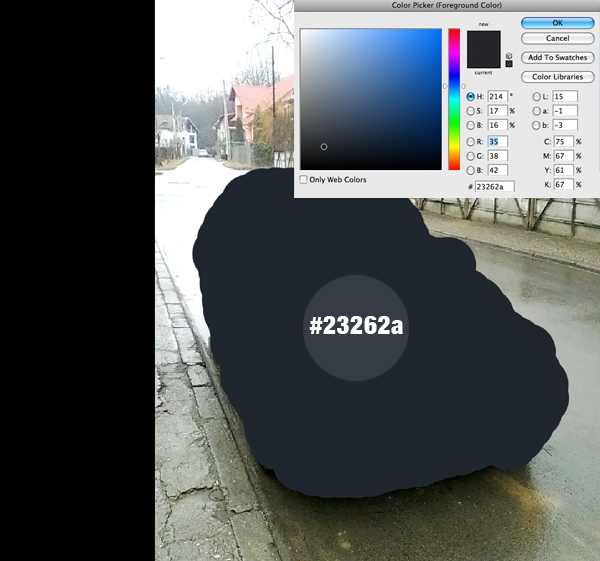
Step 2
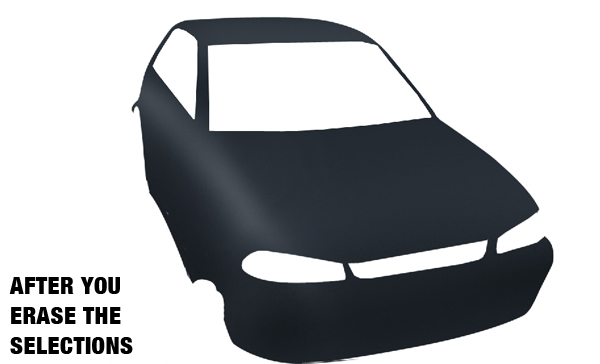
Now create a new layer on top of the image. Select the color #23262a, then using the brush simply fill the body of the car with the selected color.
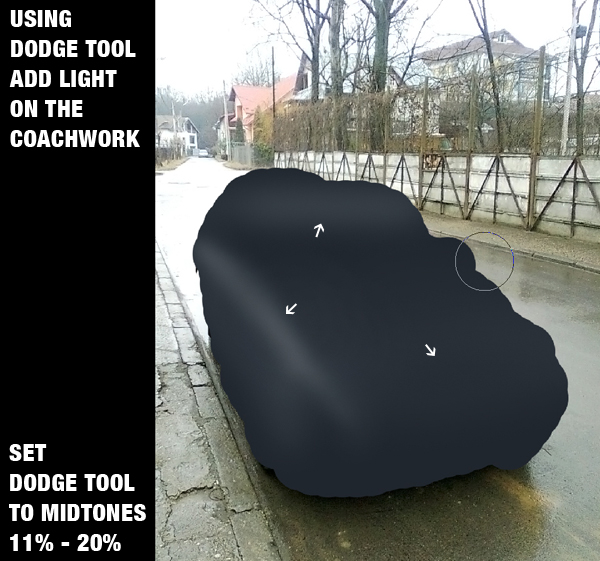
Step 3
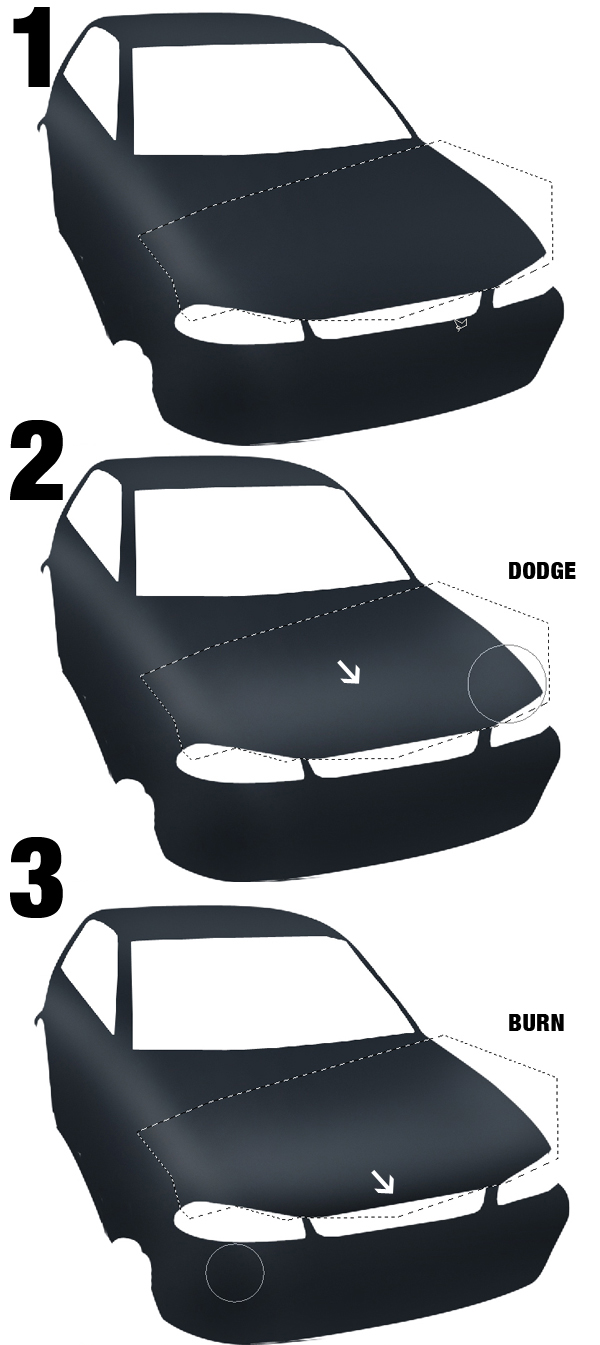
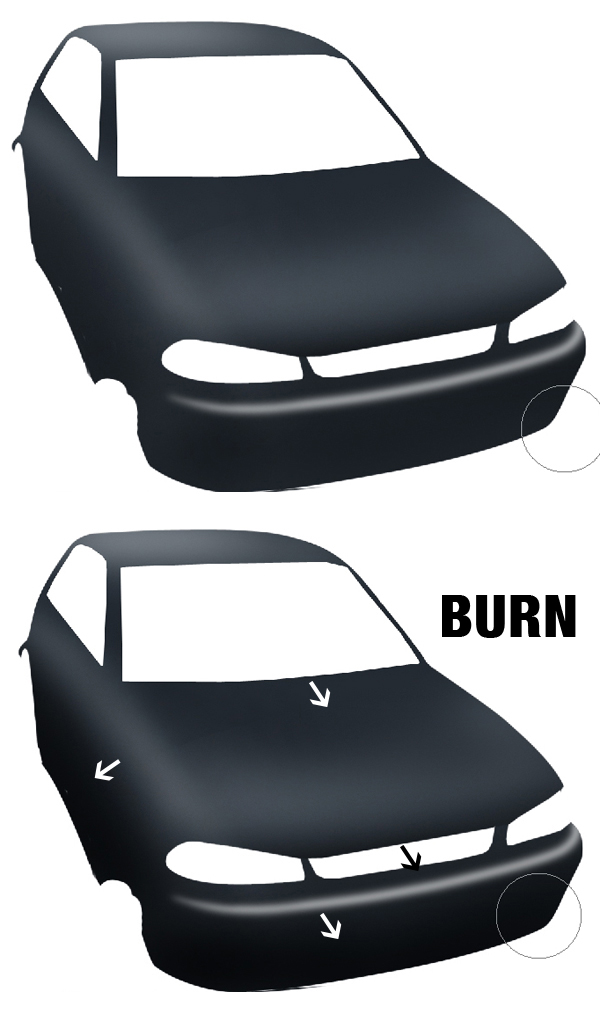
Use the Dodge Tool (O) set to Midtones with Exposure set to 11% - 20% and add some light over the coachwork.
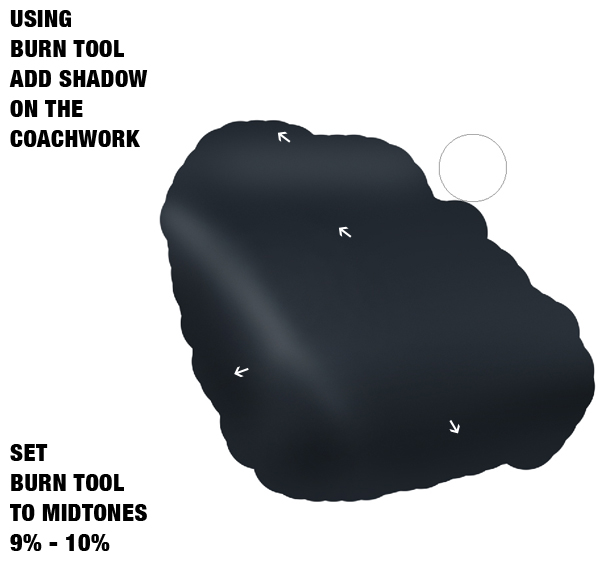
Step 4
Same as you did in Step 3, select the Burn Tool (O) with Exposure set to 9% - 10%, and add some shadows over the body. As you can see, the car image is not visible anymore, as we will just look at it from time to time to know where each part goes.
Step 5
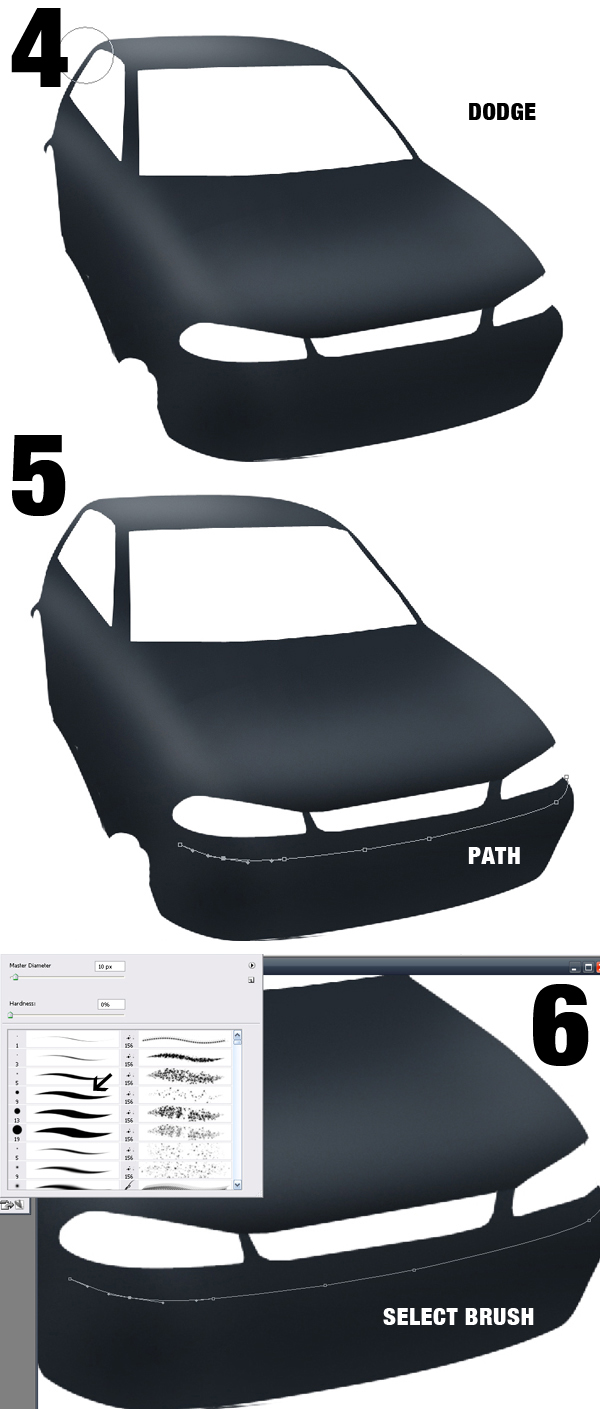
Next you need to make the car image visible again. Using the Pen Tool (P) set to Path, create a path surrounding the car and then erase the excess brush area. Now create more paths around the windshields, lights, tires, grid and press Delete to create the shape of these parts.

Step 6
Next, use the Burn and Dodge Tools to add some more shadows and lights on the coachwork.
Step 7
Next you need to create a new layer and move it below the "coachwork" layer. Now make selections of the windshields and grid and fill them with black.
Step 8
Create a new layer and use the Pen Tool (P) to create a path like below, then stroke it using a 2 px black brush. Repeat the step, but this time make a white stroke. In the end, lower the Opacity of both strokes.
Step 9
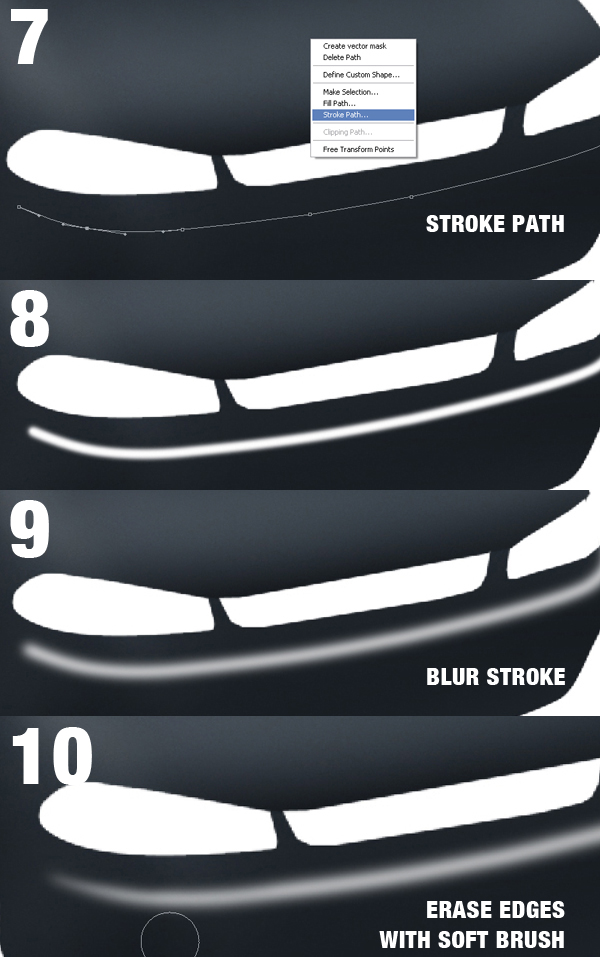
You need to learn how to create smooth and skinny strokes that you will use very often for creating this car. First, create a new layer above all the layers. Use the Pen Tool (P) to make simple paths that will simulate the shape and curve of your glossy lights. Then you simply need to stroke these paths with black or white, decrease the Opacity and maybe erase the edges a little and you are done.
Note: you will notice that in this tutorial, you will have to use this technique fairly often so rather than explain this repeatedly, you will be shown where this technique has been used.
Step 10
Create a new layer above all layers and make a selection like below using the Pen Tool (P). Then use the Brush Tool (B) to draw in the selection like below. Use a white brush for lights and #070e18 to define the shape of the object.
Step 11
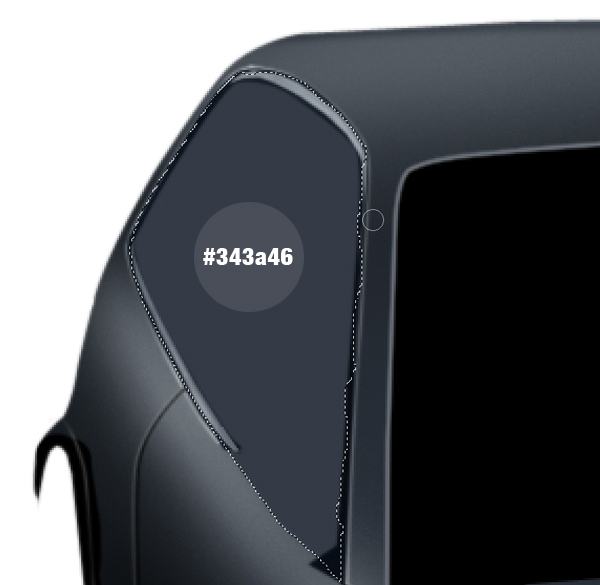
Create a new layer and place it below the "coachwork" layer, but above the "black" layer that you created in Step 7. Fill the layer with #343a46.
Step 12
In this step, create the reflection on the windows. Use the Pen Tool (P) and create a path similar to the one below. Transform the path into a selection (set feather to 0.3). Now using Dodge Tool (O) set to Midtones and Exposure 14% - 20%, draw some clouds over the shape.
Step 13
Set the Dodge Tool (O) to Highlights and add some more reflection.
Step 14
Press Command + Shift + I to invert the selection. Use the Burn Tool (B) with the Midtones and Exposure set to 13% to darken the bottom part of the window.
Step 15
Select the Dodge Tool (O) set to Midtones and Exposure 13% again and add some lights on the lower part of the window.
Step 16
Create a new layer over the "coachwork" layer and make a selection like below using the Pen Tool (P). Then draw on the selection with this color #13161b.
Step 17
Use the Dodge Tool (O) set to Midtones and Exposure 23% to add some light.
Step 18
Make another layer and a selection inside it, as shown below. Now fill the layer with the same color as before #13161b, then use the Dodge Tool (O) to add some light.
Step 19
Create a new layer and use the Pen Tool (P) to create a selection like below. Fill the layer with #2f3438. Next, use the Burn and Dodge Tools to add shadows and lights.
Step 20
Continue adding some more shadow using the Burn Tool.
Step 21
In this step, create the headlights using the same technique used for the side window.
Step 22
Repeat Step 21 for the other headlight.
Step 23
In this step, we'll create the two sprinkler heads. Creating these two objects is pretty simple. What you need to do is create two different layers for each. Also, use the brush to create 2 spots, as shown below. With the Dodge Tool (O) add some lights over them, as shown below as well.
Step 24
Create two shapes on the roof of the car for detail. First create a new layer above the "coachwork." Make a selection like below and fill them with #4d545c.
To finalize these shapes use the Dodge Tool (O) to add some lights and gloss on them, then use the stroke technique for more depth. The stroke effect does not only help the eye to make a difference between the car parts, but it also gives a really nice glossy look.
Step 25
It is time to create the windshield. Create a new layer above the "coachwork" layer. Make a selection like below and fill the layer with #4f5561.
Step 26
Adding lights, gloss and shadow on the windshield is done using the same tools used so far - the Dodge Tool and Burn Tool.
Using the Pen Tool (P), you need to create a path like below, then transform the path into a selection. Invert the selection and Use the Burn Tool (O) to darken the selection area. Now invert the selection again and this time use the Dodge Tool (O) to add some lights and gloss over the windshield.
Step 27
The final result for the windshield, after applying some more reflections, lights, and gloss, is shown below.
Step 28
It's time to create the mirrors. First of all, create a new layer above the "coachwork" layer. You can create the same shape for the mirror, but if you look below you'll see a more interesting shape that you can give to your mirror. Use the Pen Tool (P) to create this selection and fill it with #171a1f.
Step 29
Creating the depth and 3D shape of this mirror is done only with shadows and lights. The tools used are the Burn Tool and Dodge Tool.
Step 30
Use the same technique as shown in Step 29 to create the other mirror.
Step 31
Now go back to the side windows, as you need to create a separator over them. Create a new layer and make a selection like below. Fill this selection with #c5ced7, then make another selection like below and fill it with black.
Step 32
Add some more details: strokes, lights, gloss and shadows.
Step 33
You need to create the two grid parts of the car. Create a new layer, make the below shape, and fill it with black. These two are just the space where the grid will be placed.
Step 34
Time to create the Grid. Make a new layer, and in this layer create a black shape. Then use the Pen Tool (P) to make a straight line like below, and stroke the line with 2 px and #2b2b2b. In the end, multiply that stroke as many times as it is necessary until you cover all the black shape with these lines. Finally, place the grid behind the "coachwork."
Step 35
Creating the tires is quite simple because again you will use only the Brush Tool (B).
Create a new layer and place it below the "coachwork" layer. Make a selection like below and fill it with black.
Step 36
Use only three colors to create the details of the tire.
Step 37
You can create the other tire using the same technique or we can make things simpler. To do this, duplicate the other "tire" layer, move in place, and also change the perspective of the tire a little.
Step 38
It is time to create two more headlights. First, create a new layer on top of all the other layers and make a selection like below. Fill the selection with #404348.
Step 39
Now use two colors (#ffb14f and #feffed) to construct the headlight. Use the Dodge Tool and Burn Tool for more depth.
Step 40
Create the other headlight the same way you created the first one.
Conclusion
In the end, you can create a simple background and work on the Curves to add more detail. You can view the final image below or view a larger version here.
Copyright by : psd tuts+

0 nhận xét:
Post a Comment